Whether I’m sewing, crocheting, card making, painting, or doodling, I’m always making something here in Kamloops, B.C. Don’t forget to check out my free digitals and vintage graphics while you’re here. Enjoy your visit!
Showing posts with label Tips. Show all posts

Apr 17, 2022

Wet Bags and Easy Handmade Labels.

Hi there,

The other day I totally scored! I happened to find a 24 hour auction for my area that was selling a ‘plastic coated’ fabric. About 5-7 meters of it in 7 different colors. It’s called PUL fabric (polyurethane laminate) and it’s kind of expensive normally. I can only find it for about $25 CAD per yard online, or in small packages at our Fabricland store. I’m so happy I got it at such a good price. (I actually scored again in Vancouver when I got some upholstery material from Dressew’s clearance department for $4 a metre. It was a good week and I’ll be showing you what I make with those soon.)

This fabric is waterproof, wipes clean and can be used for food. So it makes great sandwich or treat bags. It’s amazing for a wet bathing suit or towel, if you want to keep everything else you have with you, dry. It’s also great for in your diaper bag for soiled baby clothes or for used diapers, until you can dispose of it responsibly.  

I made three sizes of “wet bags” as they’re called. 

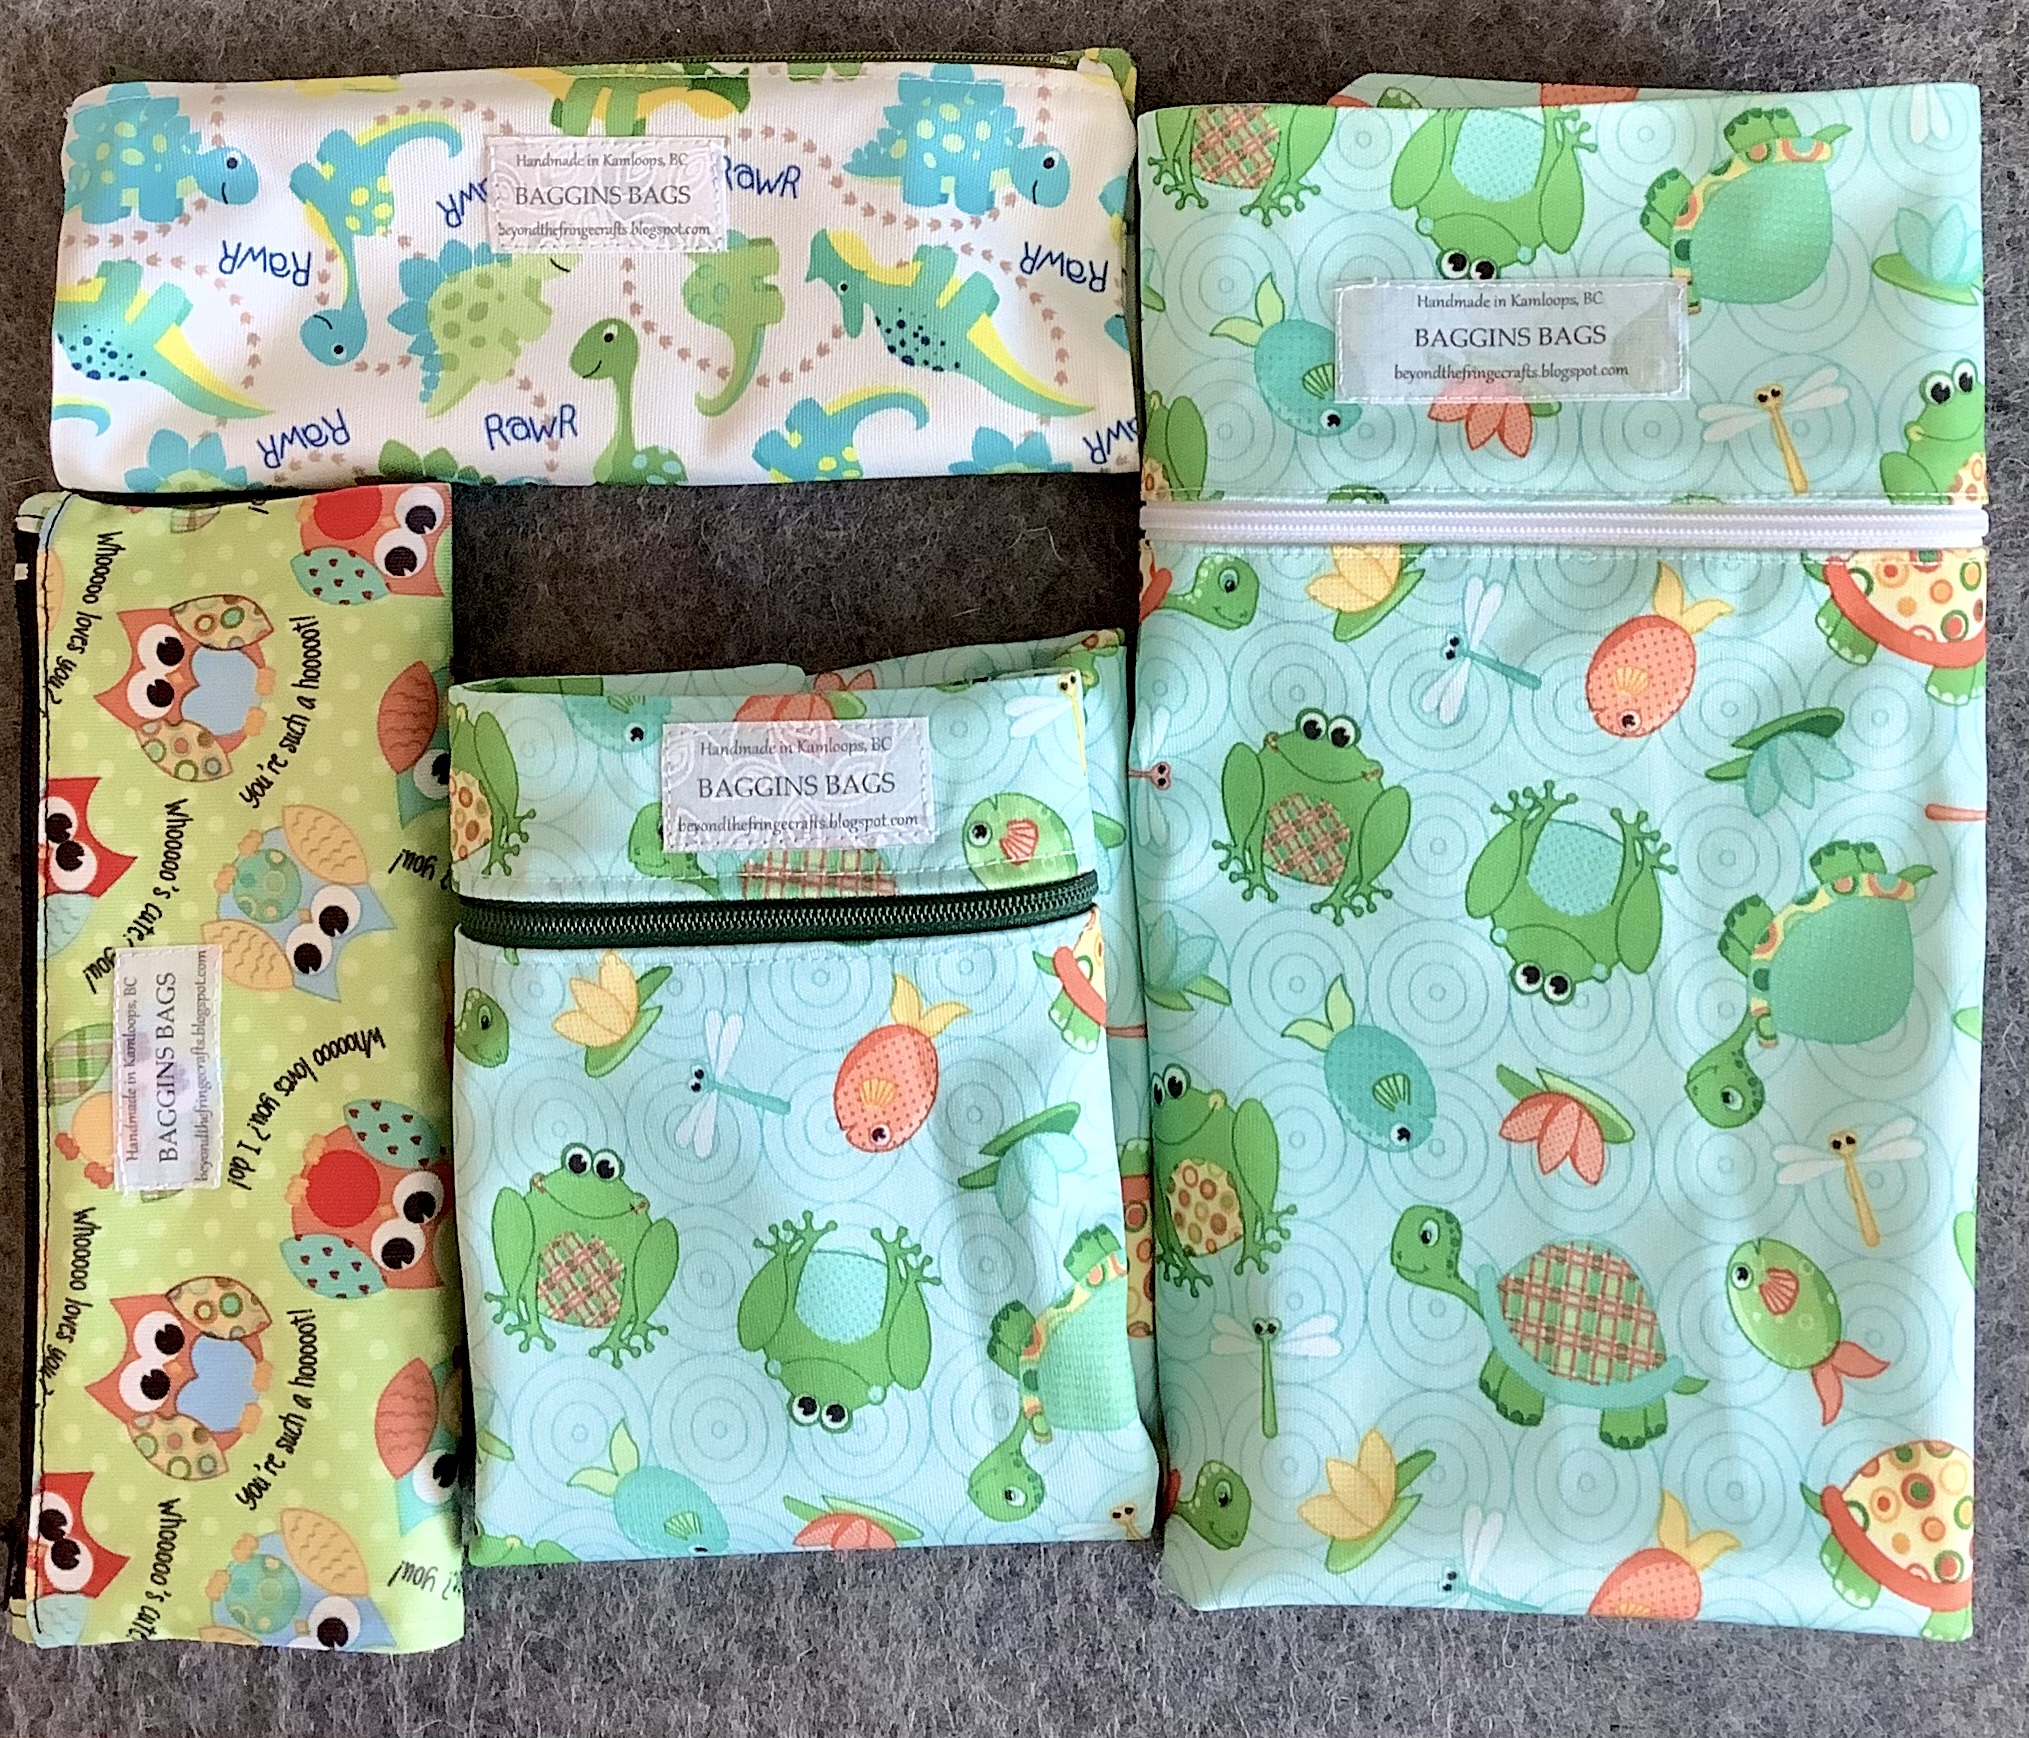
Here they are all folded and pretty. 

I decided to make up some labels (I’ll explain how I did that below), but first had to pick my husbands brain for a name, because that is so not my forte. He came up with “Baggins” as one suggestion. It reminded me of Bilbo Baggins on his adventures. So I went with “Baggins Bags.” I specifically wanted to identify them as handmade in Kamloops, then added the name and my blog address. 
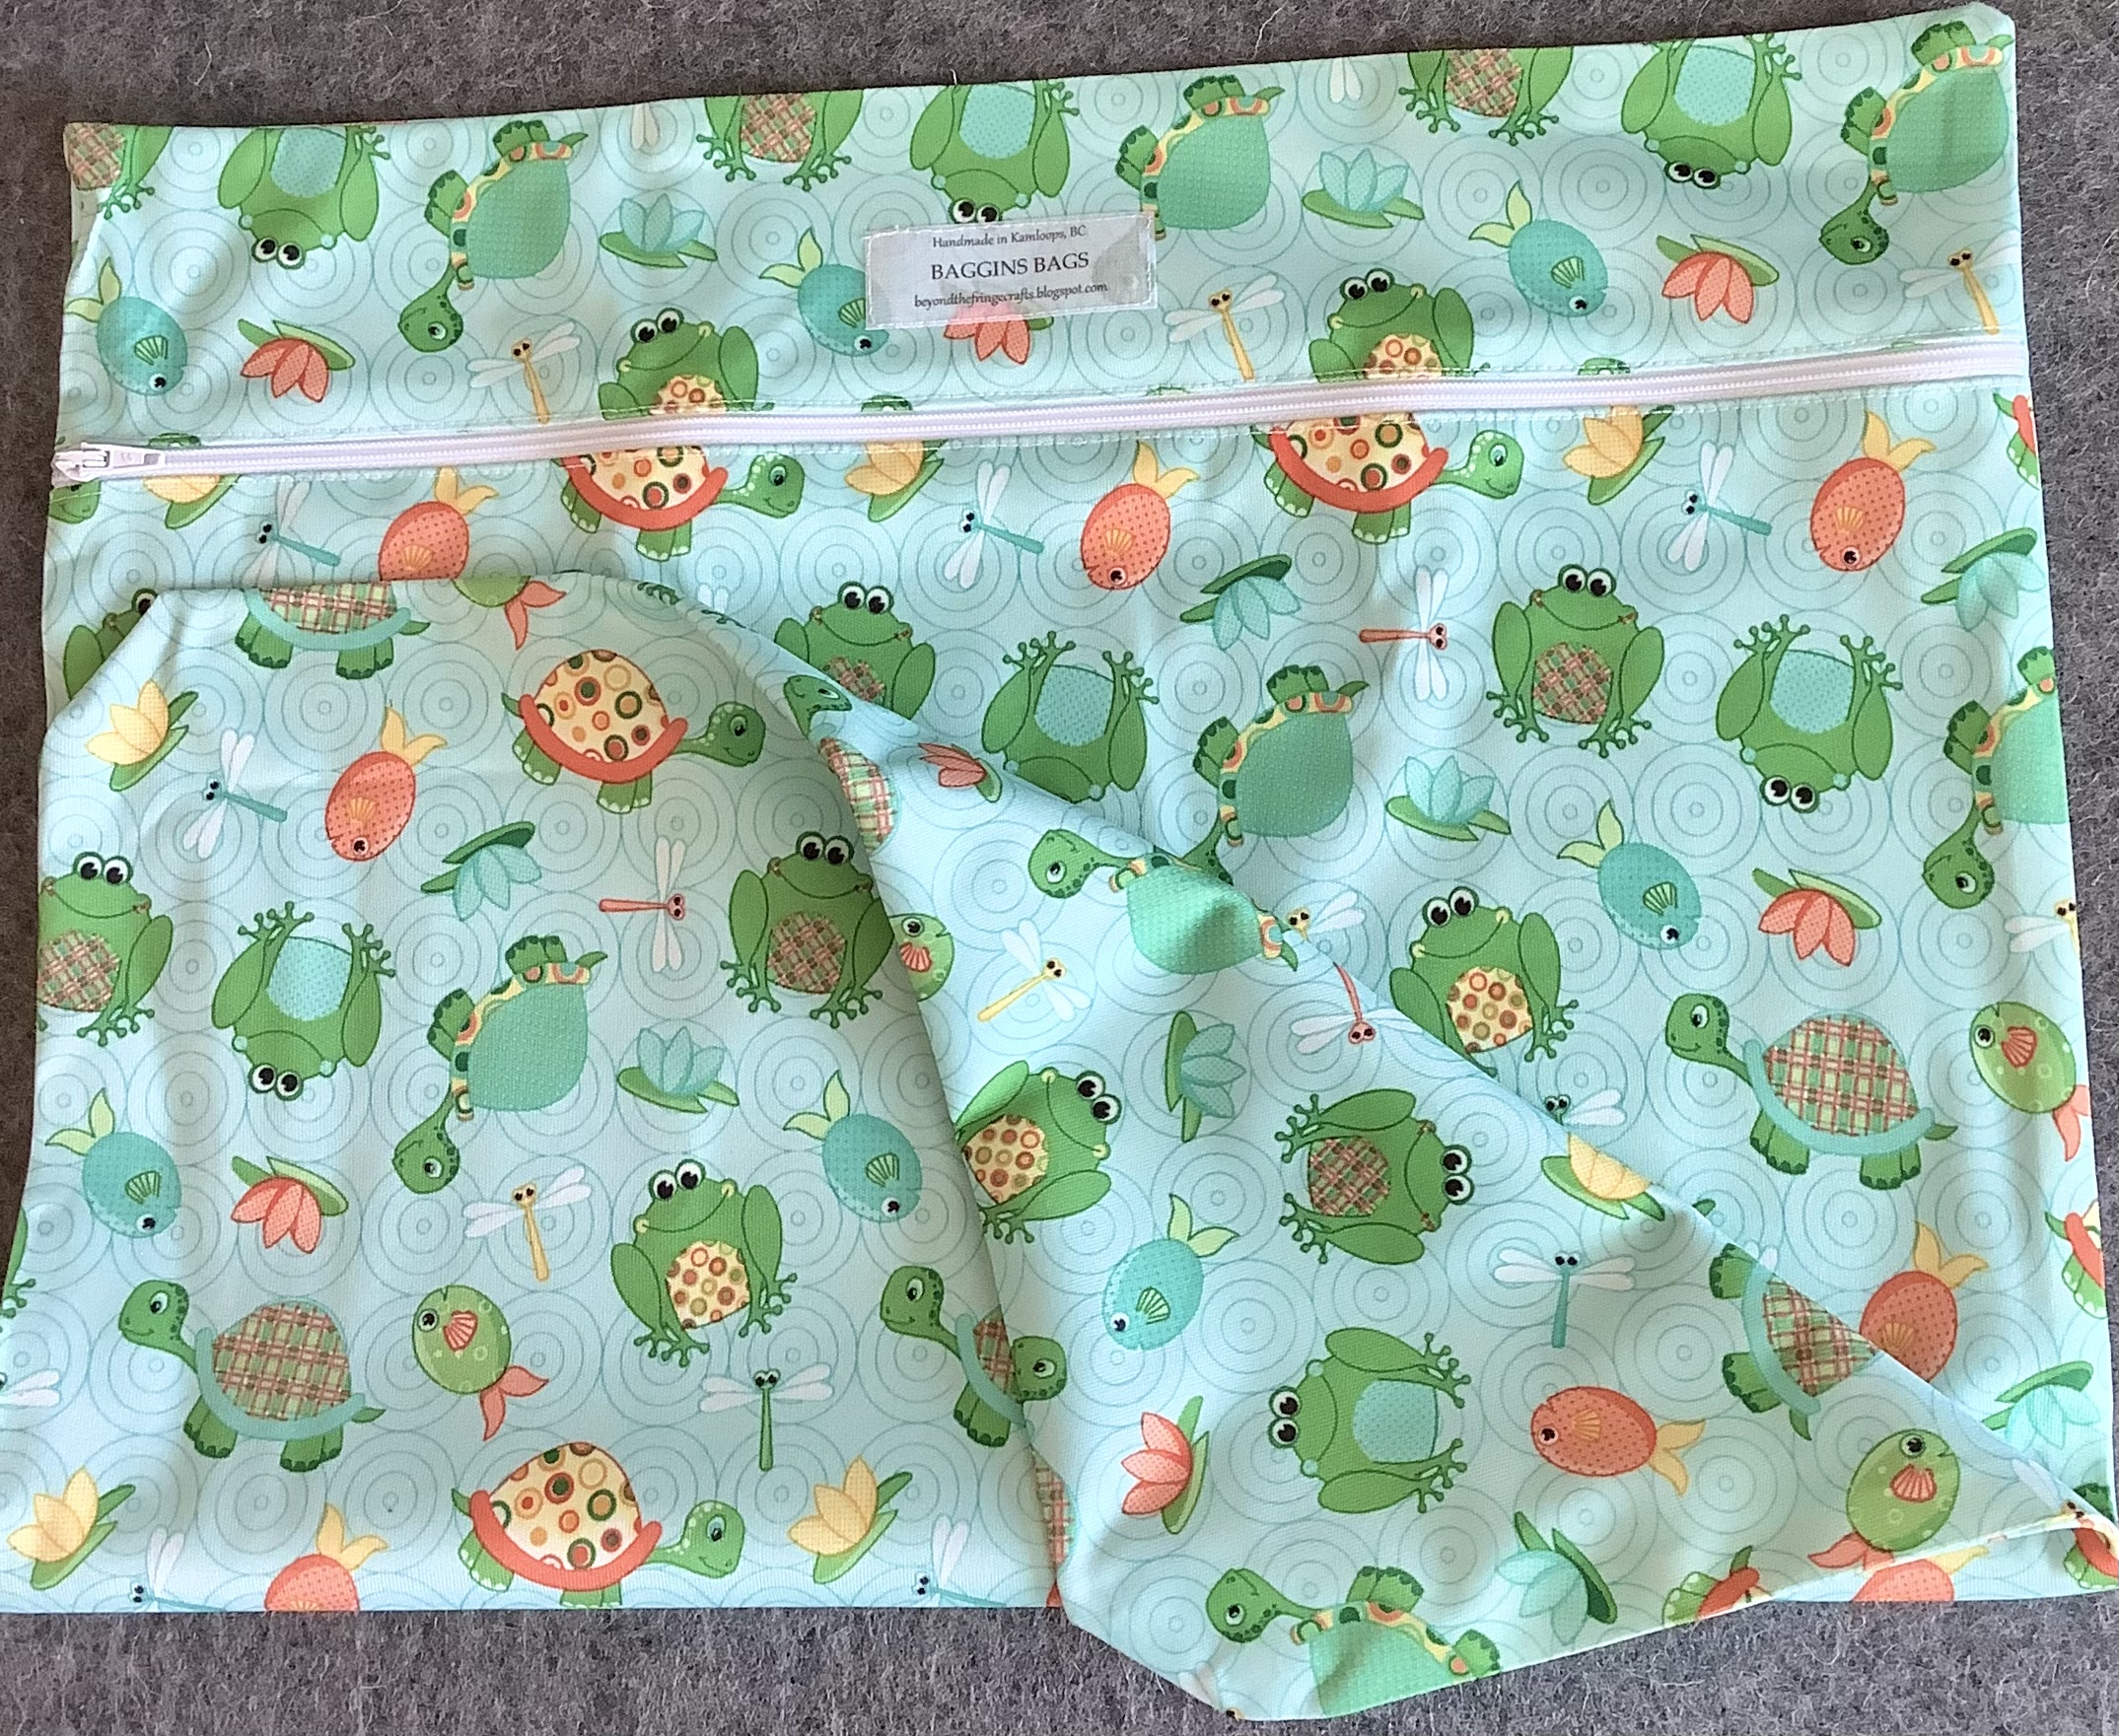

This one is a large. It’s for one of my older grandkids and can hold a wet bathing suit and towel.


The bottom two are sandwich/treat bags
The top one is for in a diaper bag.

Bottom line is you can use these for whatever you want. This fabric can be found in more “grown up” designs but this worked just fine for me. I’ll be keeping my eyes open for deals down the road, but for now I have lots more to sew up.

HOW TO MAKE YOUR OWN LABELS

The labels are super easy to make. I’ve seen several tutorials but ultimately I did my own thing, and I think it’s the easiest way to make them. 

You’ll need:

White cotton or muslin, about a medium weave.
Heat n Bond Ultrahold
Windows office
Iron

1. I went into windows office and added a table. Then just typed in the info and copied it into the whole table. Here’s my paper copy to see what it looked like.  Normally I would get rid of the grid lines, but I got ahead of myself and forgot, so I just trimmed them to size with my cutter and scissors on the fabric copy.


2. Cut  a piece of heat n bond ultrahold to the size of the printer paper. 

3. Iron your piece of white fabric, then place the heat n bond onto one side and iron it in place.

4. Cut the fabric to the size of the heat n bond. 

5. Place your label fabric into your printer. 
(With my printer I have to make sure that the label fabric will catch, so I just roll it a bit on the bottom)

6. Hit print and then let it dry a minute. 

7. Place a clean paper on top of the printed side and press it lightly with a warm to hot iron to set the ink. I also iron the back side.

That’s it! Now you can cut your labels to size.
I cut the labels into two sizes even though the print is the same on both. 


These are strong enough that you can just iron them on and they’ll stay even in the wash and won’t fray. However, I like the look of the sewing around the edge, so I do both on mine. 


To use, just peel off the back and you’re good to go. 

Alright then, I think we’re done here. Thank you for stopping by. I hope this post has been helpful in some way. 

Easter Blessings! 

Carmen


Apr 18, 2021

Attention Email Subscribers


Hi Ladies, and Gents...

So I have a little announcement: 

Feedburner will no longer be managing email subscriptions starting this July. This means that if you normally receive my posts through email, this feature will no longer be available to you. 

The same goes for those of you following on my Facebook page, which I've discontinued.

If you'd still like to receive my posts there are three other options: 

1) follow me through Bloglovin (in the sidebar to the right), or 

2) sign up as a blog follower (in the sidebar). 

3) follow Beyond the Fringe crafts on Facebook.

I want to thank you all for faithfully following me for so many years now!! I'm in awe of the fact that I have over one thousand three hundred (1300) followers when I consider Bloglovin', Facebook, email subscriptions and the Blog itself.  

It's amazing to me that people want to see my posts! 

I love putting my creative exploits out there for you and hope it serves as an inspiration for your own crafty ventures. I just love to make stuff. 

Thanks so much! 
Carmen


Nov 26, 2019

Christmas for the Coffee Lover

Hi there, 

For the first time in a long time I've been watching Christmas movies and listening to Christmas music in November. I don't usually share, but since my mom died in 2015 right before Christmas, I'd lost my desire to celebrate. Now that I think my Christmas mojo is back, I want to share something that my son and his wife put together. I think this is a fabulous idea!

My son made this in about a day (except for drying time, etc.), and my daughter in law made it look even more amazing. 

Here is their full size -- Coffee Bar ! 


Here's some close ups.


Note the chalkboard (chalkboard paint) with the writing on it. Too cute


There's a single cup coffee maker, a full pot of coffee coffeemaker, a tray with marshmallows, candy canes and cocoa, and of course sugar. Adorable


There's lots of fancy little Christmas cups and snowflake espresso cups. Note the little stuffies watching over all the coffee goodies.


The door panels slide to expose shelves on both sides with more coffee supplies at hand. Also there are more cups in the center, a Starbucks travel mug (naturally) and look at that adorable little sled-like tray! The little plants on top add a nice little touch - - all of it is just too wonderful! 

She's got her tree all done up and a little village on her piano and today it snowed there. It's definitely Christmas where they're at - music, movies, hot drinks and all! 

As for me, I can't wait to go use the new Coffee Bar!


Christmas is coming soon - don't get too frantic and remember, it's not so much about the presents but about the loved ones you're with. If you're really lucky, you can make lasting memories! 

Love the ones you're with!

Blessings,
Carmen

May 1, 2018

Metal Tape Card with some tips on how.

Good morning,

I have another card to show you today. This is a personal card I made for my father in law. His birthday is coming up this week. I believe he will be 88. He’s a jolly fellow and an endearing guy. 

I decided to play with my aluminum tape again and see what I could come up with. For at least a few months I was in search of the retired Stampin’ Up Going Global embossing folder. I was about to pull down my posts when someone responded. I got it at a great price and it arrived last week. So this is my first try with it. 

Someone asked me how to do this, so thought I’d share. It’s super simple. All you need to do is pick up some aluminum foil tape from a hardware store. It comes in a good size roll and is usually pretty cheap. 

Cut a piece of cardstock to the size you want (I went with the size of my embossing folder) and then cut a few strips of the tape about a 1/2” larger. Pull the backing off the tape and secure it over the cardstock smoothing it as you place it on and leaving a bit of overhang all around. You’ll have to do three strips for most cards. Then just wrap the overhang around the cardstock. You’re ready for the next step. 

Choose an embossing folder and run the taped cardstock through your cuttlebug/BigShot, or whatever you have. That’s the shiny part done. Now embellish your card from there. 

If you like a grungy look, you can put black acrylic paint over the tape, let it dry and wipe it with a Wet One. This works particularly well with a decorative folder as the black paint stays in the crevices. I’ve used this method with my cogs and gears folder. 

Another method is to smear inka gold here and there over the foil or alcohol inks. Check out the pictures below of some of my old projects using these methods. Also, go on Pinterest and search for ‘metal tape art’or "Metal Foil Art"- you’ll be amazed. 

This was the inside of a card. It is just the metal tape and black acrylic paint. The texture underneath the tape is that adhesive netting.

Here are a couple of frames we did up. I think I had my grandkids and daughter in law with me at the time. This one was done with the inka gold on it as well as different items under and on top of the tape.

You see how you can use different folders with the metal tape and run them through the cuttlebug before you peel the backings off. It's a different look. We used lots of different colors of inka gold on this Malma Mirror.


And these last two are portions of the same card. I can't find the photo of the whole card. Lol. Anyway, this card I used different embossing folders, adhesive netting, gears from old watches, etc. Plus, I used the black acrylic paint, and the inka gold. 

I hope if you haven’t already, you’ll give it a try. Enjoy the process!

Well, I hope the FIL likes his card- 

Blessings!
Carmen

Apr 23, 2018

Getting Creative with Digital Stamps

Good Morning Everyone,

I've been selling my Digital Stamps for quite some time on Etsy now, but have decided that the Etsy fees are too high to make it worth my while. So many of my stamps will be available on this blog again. It's going to take me some time to update them all.

Today I will share a few tips on some ways to get creative with your Digital Stamps other than running off a Digi and coloring it in.

TIP #1

This is a very easy tip but it takes a bit of cutting. First I ran off the digital stamp on white cardstock (you could just use white paper for this one instead of cardstock), and again on blue cardstock (only). I ran off two of each, ready to use on a couple of cards.


Next, I carefully cut out the large sails from the white cardstock. I want to stress carefully because with all the lines in there it's very easy to cut the sail in half, and you don't want that. 

Glue them in place on the image with the blue background matching up all the lines. Any kind of glue should work. Then I took a white pen and filled in the sails that were still wrapped, near the top of the masts. I'm giving you a large picture as it's kind of hard to see in the photo. I also painted the little box at the end of the ship white.


And you're ready to incorporate her into a card. Here's the free digi.


TIP #2

Next I'm going to show you a technique with my Stacked Cups Digital Stamp. I inserted one image onto the background, sized it, then copied and pasted the rest into place. I wanted five because there are five cups in the stack. Leave this image up on your computer because you will need it again.


Next cut out some designer cardstock that will fit over a cup stack. Five different pieces that work together. Tape them to hold them in place making sure you don't put the tape over the area to be printed. Again, I've done twice the amount for my own use. You would only need to do one sheet.


Now place the sheet into the printer and run it off again. Here is my one sheet ---


And here is my other sheet. A good example of what not to do. Make sure you place the sheet into your printer correctly and not upside down, like I've done below.


Ya, I did that. Sigh. OK, nothing to see here, move along. 

Since two of the stacks above came out alright I just re-did three of them. Note how my paper got shifted a bit when I put it through a second time. Make sure you cut the cardstock wide enough to allow for a bit of that. I'm not using the bottom portion, so it's totally ok.


I suddenly became very aware of how many mistakes I made, but hopefully my mistakes will encourage you to not repeat them. 

Next mistake  step. You'll have to do a bit of fussy cutting with an exacto knife for the cup ears. I also recommend you do that first, as it makes it easier not to cut them right off. 


When done, cut out the cups (again, you'll only have 5 to do). I left the saucers on the bottom cup, but you could cut them out too. 

You'll notice my tape got into the print area on some of the cups, both on the top and bottom. 

Oops. 

Again, try not to do that.


Now just re-stack them. I haven't glued mine onto cardstock yet, this is just to show you.


Also, who says you have to have five cups in a stack? Go ahead and play---


And that's the second tip. 

Now the third tip really doesn't need any photos. 

TIP #3

Print off your digital stamp.

Rub your image with a bounce sheet or one of those anti-static bags. 

Using an embossing pen (I just use clear), outline your digital and throw some embossing powder on there. I usually use black powder but get creative if it suits your fancy.

Use a heating gun on the powder and go ahead and color in the image when ready.

It just adds another dimension to your image and makes it stand out a bit more. 

I use whatever embossing pen I can find because I live in a community where choice is a byword when it comes to some things. They run about $10 CAD here. It's a worthwhile investment if you like to play with digi's. 

Okay, well there it is. 

Hopefully I get creative and make some cards soon with these images. 

Until then, 
Blessings,

Carmen

Jul 10, 2015

Tall Sew Together Bag and a Tip!

The other day my grandson was over and happened to see the Sew Together Bags I have in my sewing room. I made his mother one last Christmas that she uses as a medical bag. He really liked that one and so he asked if I would make one for him, only bigger and made out of transformer material.

We live in Kamloops, B.C., so I didn't know if I would be able to find that type of fabric. We are a small city with a population of about 80,000 but sometimes it's still hard to find exactly what you want.


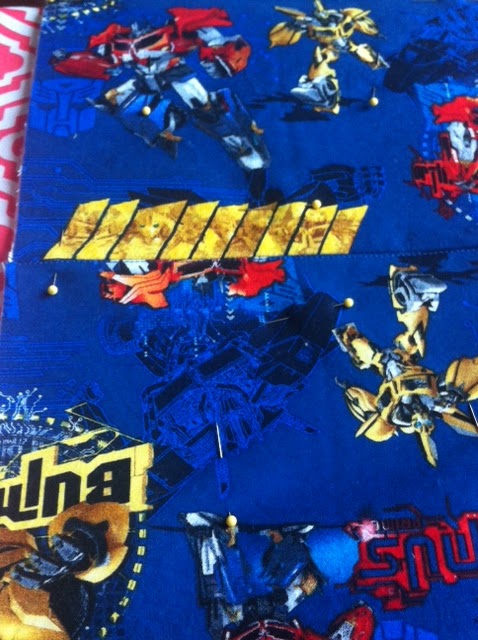
I used Tonka Truck fabric for the inside and Spiderman fabric for the sides. Quite appropriate for a 6 yr. old, don't you think?


Here we have the zippered pockets in blue, yellow and red.


I love the red accent on this bag; here's the side piece completed.


Lucked out! Transformer fabric!!


The completed bag.
 It looks different than the other bags because it's 2 inches taller, but it's still  the same width as the original bag. All my measurements worked out just fine. I surprised myself! The other side has a couple of the transformers pictured.


Here's an idea of how much taller Kai's bag is. See the zippers in the orange bag on the right? Match them with the zippers in Kai's bag and you'll see how much taller it actually is. 

Kai's bag isn't completed in this photo, so it's even taller than it looks here. Sure is roomy too. The pockets are about 5 1/4" deep instead of 3 1/4". I'm happy with the way it turned out and so was Kai.

THREADING TIP

Here's a little sewing tip! Well, it's actually a threading tip. My eyes aren't as good as they used to be so I have quite a time threading my machine needle. The other day I figured out a very easy, no cost tip that makes it so much easier. I couldn't believe I hadn't thought of it sooner! If you're like me, you may appreciate this little tip.


Notice all the shiny silver? Pretty, but I can hardly see the hole in the needle, even with my glasses on. Okay the truth is I can barely even see the needle with all this shiny silver stuff going on.


Here's my fix. I ripped off a piece of used white card stock I had sitting around and put it behind the needle. It takes away the sheen of the silver and allows me to see the hole in the needle. Yay.


I threaded this sucker first time I tried. :) I can't believe how much easier it was. 

So, nothing too exciting here, but it sure does make threading and re-threading my needle easier, quicker and definitely less frustrating. A win, win, win situation!

My DIL came over last weekend and we prepared some things for her next few projects. I helped her with some of the prep work, so I'll be showing some of that on my blog in the near future. They'll be baby themed! 

Have a good weekend!

Blessings,
Carmen

Jun 5, 2015

Save Money!

                                                                        Source: Cliparts.com

I have a friend. Actually, I have several friends, but this particular friend loves to go to Garage sales. I've watched in fascination as she supplied her daughter with a hope chest filled to the brim with almost new stuff from garage sales for pennies on the dollar. Her other daughter received many items in almost new condition to fill her baby room. It's amazing how well she does at these sales. She says that she often finds things that people received duplicates of that are in brand new condition. Toasters for $2, for example.

Since I've been in the mood to simplify (so far I haven't missed a thing), I've given away or got rid of a lot of things. However, there's something to be said for garage sales, as long as you're buying what you actually need!

The other day my pregnant DIL and I went to some local garage sales. I could not believe the deals she found; a baby swing in almost new condition for $5; a milk pumping kit (these are $200 and up new) for $20, plus quite a few other things.

I found a 12 place setting of dishes in almost new condition. I needed them and I was looking at about $100 for an 8 place setting, but bought these for $15. I'm happy and I don't care that they're not brand new. I threw them in the dishwasher and they're ready to use.


Yes, I'm SOLD on garage sales. I'm starting a list of things I need and will be looking now that garage sale season is in full swing. Getting a great deal makes me feel good and saves me money. What's not to like about that?

Have you ever gone to garage sales? Do you find good stuff and do you save lots of money? I'd love to hear.

Anyway --

Here's a little BONUS video tip I found. I love using binders for my stickers, handmade cards I've received, even stamps!


Have a good weekend everyone!

Blessings,
Carmen

Mar 26, 2015

Confessions of a Craft Supply Hoarder

I try so hard to be practical, resistant to good sales and self-controlling, but the truth is -- I've slipped up. 

Anyone that has been following this blog for a while knows that I love to make cards, crochet and sew. If you've been around a really long time, you know I've made lots of soap, digitals, some mixed media and altered projects. Did I mention my clays, canvases and teacups? I'm sure I've still left something out. Ah yes, my felted dolls....see what I mean?


I've been very good at storing all of my supplies neatly. Which really just gives the impression of having less. 

So, recently I sold off most of my soaping supplies because I realized that I had to cut back some where. My husband dislikes the strong scents when I make soap, so it was the obvious loser. I love a good bar of homemade soap though! I saved a few basic supplies and I know I can always use Crisco and Olive Oil to make soap. You may think I'm fooling myself, but honestly it's about not having hoards of supplies around 'just in case.' I will use them. 

I guess I've been thinking that way for a while when I came upon a post by Cheryl at "Sew Can Do." Her post about fabric hoarding certainly related to my situation.  If you're having the same problem, check out her post - you may find something helpful there! 

The good news is that I have been doing some of what she mentioned to get my stash under control. 

The bad news? I have a long, long way to go because I have so many crafts I love to do. I still have at least 6 large containers of fabric, at least 8 drawers full of paper, 2 large containers full of yarn, tools and supplies and well, I'll stop there. 

In all fairness, I have given a lot of supplies away, donated some things I've made and sold others. I'm trying, really I am. However, I will not leave myself short. I do plan on creating for the rest of my life! I'm keeping what I truly love and making sure I use it! 

Do any of you find yourself in the same situation? Are you doing anything about it or are you happy with what you have? Do you give it away as gifts? Donate it? 

Anyway, I hope you all have a good weekend! 

FYI, I'm working on a digital right now. It should be available for free soon! 

Blessings,
Carmen

Feb 15, 2015

Top Ten Of All Time!

As a blogger I love to write blog posts and share my creations with you. It is so much fun!

However, when it comes to keeping track of the numbers and all the details involved, marketing skills, and grouping -- I don't really shine. Truthfully, that has become such an important part of being a successful blogger, especially in recent years, that it is a necessary part of blogging. 

So here I am, bringing you my top ten. I feel a little guilty about this because I'm not even sure it really truly counts as an original blog post, but hey...everyone's doing it. I know this far from encompasses what it'll take to be a successful blogger, but that'll take time, unlike Rice Krispie Squares! 

There were some surprises!   My Christmas posts are the most popular overall. Two of them are Sleigh Rides. Perhaps it is because I started doing them prior to Pinterest becoming really popular. Valentine images are also popular. 

The surprises to me? The Page, the Elf Boot and the Mushroomville Digital. I had no idea.

Here we go from 1 to 10: 

#1 Sleigh Ride #3 (A collection of Christmas ideas, recipes, decor, etc.)
by Crazy Domestic
#2 Digital Stamps Page


This was not even a post but is a page on my blog ( See above) . It's crazy, but a LOT of people look at this page. It's more of an informative page about Digital Stamps, what they are, how to use them, etc.  


By: Beyond the Fringe Crafts

Also found HERE
By: Beyond the Fringe Crafts
By: Beyond The Fringe Crafts
#5 Sleigh Ride #2 (A collection of Christmas recipes, ideas, decor, etc.)
By: Coley's Corner
#6 Primitive Angel Freebie
By: Beyond the Fringe Crafts
#7 Primitive Snowman Digital


#8 Free Heart Tree Digi's (Various colored Heart Trees and one blank)


#9 Awning Card (There were several Digitals made to be used with this card)
By: Beyond The Fringe Crafts
#10 Mushroomwille Digital Stamps


I guess it's good to look once in a while. I'd sure hate to get caught up in the numbers though! My steampunk images were so popular when I came out with them, that I'm very surprised not one made the top ten. I guess that's why you have to look!

In Other News:

I'm still working on my kitchen. Almost everything that needs to be painted, is now painted. So happy!! 

On the not so happy front, I just found out that the counters are not going to be in until the 20th (2 weeks later than previously indicated to me!!).  

"Patience is a virtue...patience is a virtue......."

I'm just going to keep telling myself that. Unfortunately, the kitchen update will have to wait.

Have a good week and be kind to everyone you meet!

Carmen