Supplies:
Paper cups
Napkins
Tape
Glue
Cardstock
Scissors
Ribbon
You’ll notice I had to cut my cups down an inch or so. I could only find tall paper cups at the dollar store.
I opted to make little bottoms for my boots. These were made by tracing the bottom of the cup, and adding a little loop at the front. This is for the toe part of the boot. This is also an optional step. It will work without a sole. I beaded a bit of glue around the bottom rim of the cup and added the sole.
Next I pulled the napkin at the front of the boot over the rim of the cup, pushing in a bit at the top of the toe round, and then taped that into place on the inside of the cup. That’s enough to hold it in place while you pleat and fold the napkin into the cup all the way around.
The toe part is a bit tricky but just play with it until it looks ok. This is how one of mine looked before I taped the inside of the cup down a bit better. I did the front part first, but whatever works.
More tape wherever you think it’s needed. There’s the inside of mine. It doesn’t matter that it looks messy because the kids will take the gift and candy, and the boot will eventually be thrown out with the wrap.
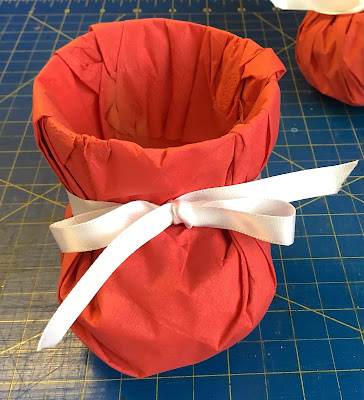
And here it is with the ribbon on. If you’re good with tying bows, 24” will do you. If you struggle, cut 30”. You can cut the tails down after.
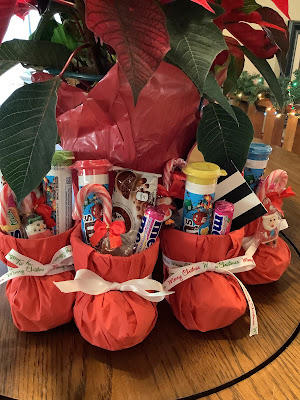
Then comes the really fun part where we fill it with candy and gifts. Two of these have gifts included, and two are going to be included with gifts and only contain chocolate, candy canes, gummies, etc. If you are giving gift cards or jewelry, etc., these are perfect for teens or kids.
Hope you try to make your own. As promised, here’s the link to Maria Bauer at Maria’s Foodstyle. You’ll find a little video there as well which may be easier for some to follow along with.
Thanks for stopping by !
Blessings to you this Christmas,
C~


No comments:
Post a Comment
Thanks for the comments!