
Some time ago I told you about a pouch I was making. Several things (and posts) have happened since then, but today I finally finished it and am posting about it.
This is a simple little pouch using canvas with heat n bond embellishments and some beading. Cute but effective. I had originally made up steps to make one, but forgot to photograph the last steps, so I'll show you what I do have.
First the little pouch.

The inside of the pouch.

This is where she started out! I cut up some fabric, and fussy cut out a tree trunk and branches.

Then I ironed them onto some heat n bond and cut them out.

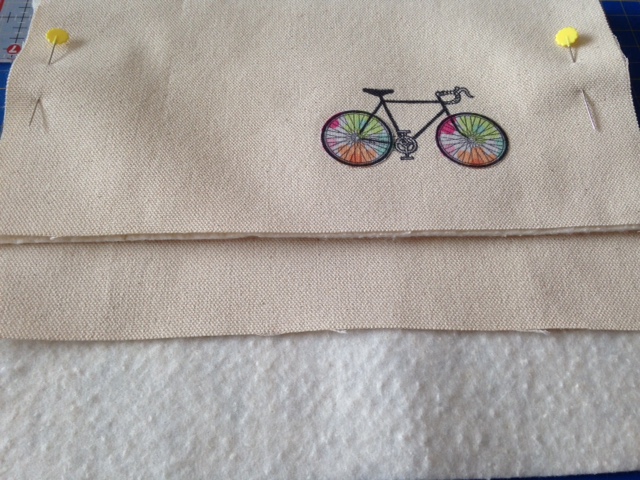
I cut out some canvas and some quilt batting the same size, then using Staz On Ink, I stamped the bicycle onto the canvas. I used a permanent marker to outline the frame of the bike. Then ironed it.

Using the flowery material, I also stamped the bike onto that, cut out the wheels and sewed them on. I went over the tires with the permanent marker. Then ironed it again and sewed a silver bead in the center of each wheel.
I cut out a bunch of the flowers from the fabric and saved them to use on the tree.

Since they already had heat n bond on them, I ironed them in place, then put little beads in the center of each one.

That's where the process ended as far as photos are concerned. I sewed the lining and the outside of the pouch together, adding a zipper. Then I pressed it a bit more since the canvas doesn't lie very flat. That's it!

And that's the end of my post!
Blessings everyone!
Carmen
What a gorgeous wee pouch Carmen - and thanks for the 'how to'.
ReplyDeleteBlessings
Maxine
Thank you!! You're so welcome!!
DeleteWell done!
ReplyDeleteThank you!!
DeleteI read your disclaimer for usage of free prints; when I find something that has a Scripture on it , I like to post to my FB page to share with others. It will usually have on the bottom the Web page / name. Can your prints be used in that manner? duenml@comcast.net?
ReplyDeleteHi Linda, I pmd you!
ReplyDelete